EleksCava User Guide
Complete setup and usage guide for your EleksCava cryptocurrency and stock market display device.
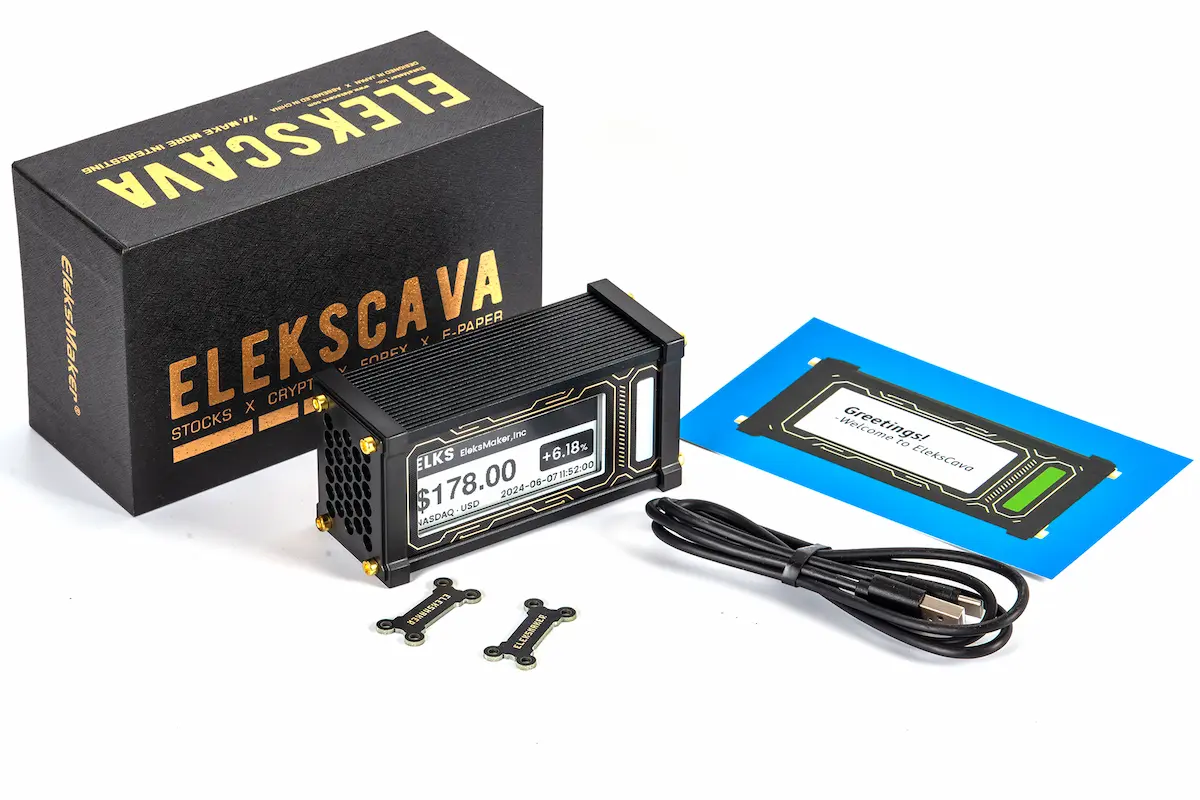
Product Overview
EleksCava is an ESP32-based intelligent financial market display featuring a 2.9-inch E-Ink screen for real-time cryptocurrency and stock price monitoring.
Getting Started
1. Power On Your Device
Connect your EleksCava to a power source using the USB-C cable. The device will automatically power on and display the startup screen. If WiFi is not configured, it will automatically enter configuration mode.
2. WiFi Setup
- Method A — Browser Setup (Recommended): After flashing firmware via www.elekscava.com/firmware, a WiFi configuration dialog will automatically appear in the browser. Enter your WiFi name and password, the device will save and restart to connect.
- Method B — AP Hotspot Setup: If the device enters AP mode (LED turns blue), search for the hotspot named 'EleksCava_XXXX' on your phone or computer (no password required). After connecting, the configuration page opens automatically, or visit http://192.168.4.1 manually.

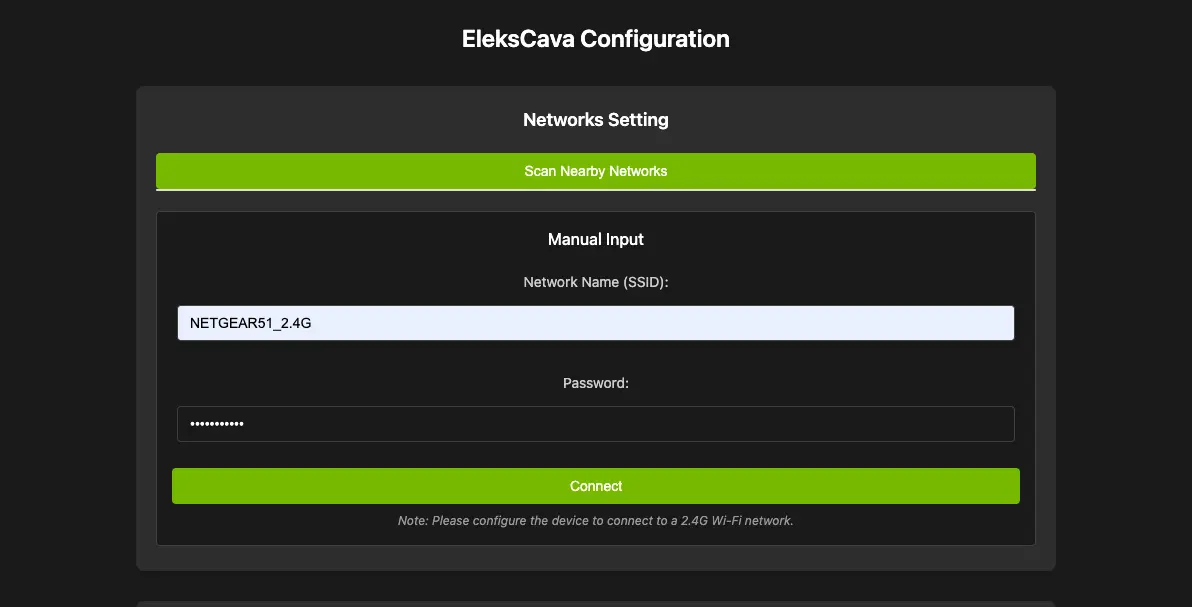
3. Network Configuration
- Select your WiFi network (2.4GHz only), enter WiFi password, click 'Save' button
- The device will automatically restart and connect to your WiFi network
- After connecting, access the device configuration page at http://elekscava.local in your browser
Button Functions
Basic Button Functions
| Key | Function |
|---|---|
| Key A | Switch to next cryptocurrency or stock |
| Key B | Switch display mode (Cryptocurrency → Stock → Time → Weather → Device Info) |
| Key C | Switch to previous cryptocurrency or stock |
Combination Button Functions
| Combination | Function |
|---|---|
| A + C (10s) | A + C long press (10 seconds): Enter WiFi configuration mode (AP mode), LED turns blue |
Cryptocurrency Configuration
Accessing Configuration Interface
- Open http://elekscava.local in your browser (or enter the device IP address)
- Navigate to the main configuration page and find the 'Cryptocurrency Settings' section
Adding Cryptocurrencies
- Enter cryptocurrency symbol in the input box (e.g., BTC, ETH, XRP)
- Smart suggestions will appear to help you select the correct cryptocurrency
- Click the '1.Add' button to add it to the list
- Maximum of 15 cryptocurrencies supported
Supported Cryptocurrencies:
Managing Cryptocurrency List
Sync to Device
- After completing list configuration, the '2.Sync to Device' button will automatically activate
- Click this button to sync configuration to device
- After successful sync, device will automatically update display
- Use device buttons A/C to cycle through different cryptocurrencies
API Data Source Selection
EleksCava supports multiple cryptocurrency data sources. You can switch between them in the Web configuration interface.
Fiat Currency Pairs
EleksCava supports pricing cryptocurrencies in 45 different fiat currencies.
Supported currencies: USD (default), EUR, GBP, JPY, CNY, KRW, AUD, CAD, CHF, HKD, SGD, TWD, INR, BRL, and 31 more.
Stock Configuration
Accessing Stock Configuration
Find the 'Stock Settings' section in the Web management interface
Adding Stocks
Supported Markets:
- Select market type from dropdown menu
- Enter corresponding stock code
- Market code format examples: US stocks use ticker symbol directly (AAPL), Shanghai stocks use 6-digit code (600519), Shenzhen stocks use 6-digit code (000001), Hong Kong stocks use 5-digit code (00700)
- Click '1.Validate' button to verify code validity
- After validation, click '2.Add' button to add
- After configuration, click '3.Sync to Device' button
Stock Display Information
- US stocks display $ symbol
- A-shares display ¥ symbol
- Hong Kong stocks display HK$ symbol
- Support for after-hours trading data (US stocks)
- Display 'Not Trading Hours' during non-trading times
Weather Display
EleksCava can display current weather conditions. Access this mode by pressing Button B. No API key required.
- Data source: wttr.in (no API key required, works out of the box)
- City detection: Automatic via IP geolocation, or manual city input
- 3-day forecast: Today + next 2 days with temperature range and weather indicators
- Update interval: Refreshes every 10 minutes automatically
- LED temperature mapping: Smooth gradient from blue (cold) → green (mild) → red (hot)
Time Display Configuration
Configure how time is displayed when in Time mode (Button B).
- 12-hour / 24-hour format toggle
- Timezone selection: UTC-12 to UTC+14
- NTP server configuration (default: pool.ntp.org)
- Daylight Saving Time (DST) toggle
Price Alert System
EleksCava can alert you when significant price movements are detected within a 1-minute rolling window.
- Sampling rate: Every 5 seconds (12-sample circular buffer)
- Configurable thresholds: 0.5%, 1%, 2%, 3%, 5%, 10%
- Alert methods: LED flash, buzzer, or both
- Automatic cooldown period to prevent repeated alerts
Buzzer / Sound
EleksCava includes a passive piezoelectric buzzer (GPIO 25) for audio feedback.
- Startup welcome melody on boot
- Price alert notification sound
- Volume levels: Low (25%), Medium (50%), High (80%)
- Can be disabled in Web configuration
Device Info Screen
Press Button B to cycle to the Device Info screen, which displays:
- IP address and MAC address
- WiFi signal strength (RSSI)
- Current firmware version
- Available memory / heap status
- Battery status (if applicable)
Firmware Updates
Update Preparation
- Ensure device is powered on and running normally before starting the update
- Check current version: View current firmware version in device Web management interface
- Stable network environment: Ensure stable WiFi or USB connection
- Sufficient power: Keep device connected to USB power during update
Web Interface Update (Recommended)
Online Update Method
- Visit official website: Use computer browser to visit www.elekscava.com/firmware
- Connect device: Ensure computer and EleksCava device are on same network
- Enter update mode: Find 'Firmware Update' option in device Web management interface or visit http://[device-IP]/firmware
- Select update method: Online update (download latest firmware directly from server) or Local update (upload downloaded firmware file)
WebSerial Update
- Preparation: Use browser supporting WebSerial API (Chrome 89+, Edge 89+), Prepare USB-C data cable to connect device to computer
- Access firmware page: Visit www.elekscava.com/firmware using Chrome or Edge browser
- Connect device: Connect your EleksCava device to your computer via USB-C cable
- Start update: Click 'Install Firmware' button, Select the serial port when prompted, Wait for installation to complete (about 2-3 minutes)
- WiFi Setup: After flashing, a WiFi configuration dialog will automatically appear. Enter your network credentials and the device will restart to connect.
Update Precautions
Pre-update Check
- Backup configuration: Important WiFi and coin configurations may need to be reset after update
- Network stability: Ensure stable network connection during update process
- Power guarantee: Do not disconnect power or remove USB connection during update
During Update
- Progress display: Device screen will show update progress during update
- LED indication: LED will show special colors during update (usually purple or white flashing)
- Auto restart: Device will automatically restart after update completion
- Time requirement: Entire process usually takes 3-5 minutes
Post-update Setup
- Verify version: Confirm firmware version has been updated in Web management interface
- Reconfigure: Check and reset WiFi, coin list and other configurations
- Function test: Test all button functions and display modes are working properly
If Update Fails
Recovery Steps
- Reconnect USB cable and try updating again
- If device doesn't respond, disconnect and reconnect power, then retry
- Contact support at [email protected] if problems persist
Advanced Settings
Refresh Intervals
LED Indicator Settings
Timezone Settings
- Default automatic timezone detection
- Manual timezone selection (UTC-12 to UTC+14)
- Affects time display and trading hours judgment
- Web configuration interface supports 4 languages: English, Simplified Chinese, Japanese, Korean
Welcome Screen Customization
Customize the startup welcome screen title (default: 'EleksCava') via the Web configuration interface. The welcome screen also displays firmware version and MAC address.
Static IP Configuration
For advanced users who need a fixed network address.
- Toggle between DHCP (default) and Static IP
- Manual configuration: IP address, Gateway, Subnet mask, DNS server
Custom Display API
For developers: EleksCava exposes HTTP endpoints to push custom content to the E-Ink screen.
| Endpoint | Description |
|---|---|
| POST /api/display/text/simple | Push plain text to screen |
| POST /api/display/text/icon | Push text with icon to screen |
| POST /api/display/alert | Push alert message |
| POST /api/display/notification | Push notification |
| POST /api/display/market-summary | Push market overview |
Serial Debug Commands
For advanced users and developers. Connect via USB serial (115200 baud) to access debug commands.
| Command | Description |
|---|---|
| viewlog | View device logs |
| clearlog | Clear logs |
| get_status | Query device status |
| memcheck | Memory diagnostics |
| factory_test | Enter factory test mode |
Frequently Asked Questions
How to reconfigure WiFi?
Simultaneously long press buttons A and C for about 10 seconds, when LED turns blue you can reconfigure network.
Why can't I see my WiFi network?
Device only supports 2.4GHz WiFi, please confirm your router has 2.4GHz band enabled.
How to perform factory reset?
- WiFi reset only: Long press A+C for 10 seconds — clears WiFi credentials only, keeps your cryptocurrency and stock configuration intact
- Full factory reset: Visit www.elekscava.com/firmware, flash the firmware with full installation — this clears everything including WiFi, crypto list, stock list, and all settings
How often does data update?
Data fetch interval is every 30 seconds (fixed). Full screen refresh defaults to every 60 minutes to prevent ghosting (configurable via Web interface). Note: data fetch and full screen refresh are independent — data updates in the background, while full screen refresh redraws the entire E-Ink display.
Which cryptocurrencies are supported?
- Supports mainstream cryptocurrencies from multiple data sources including Gate.io (default), Binance, CoinGecko, and more (maximum 15). Popular coins include:
- BTC (Bitcoin), ETH (Ethereum), XRP (Ripple)
- USDT (Tether), SOL (Solana), BNB (Binance Coin)
- DOGE (Dogecoin), ADA (Cardano), TRX (Tron), and more...
Which stock markets are supported?
- US stocks: All NYSE and NASDAQ stocks
- A-shares: All Shanghai and Shenzhen stocks
- Hong Kong stocks: Hong Kong Exchange main board stocks
Is E-Ink screen flickering normal?
Yes, normal. E-Ink screens have brief flickering during refresh, this is a technical characteristic.
Can multiple coins be displayed simultaneously?
Device displays one coin/stock at a time, use buttons A/C to quickly switch between different items.
Why won't the device start properly after power loss?
First disconnect power from the device, then hold any key (A, B, or C), toggle the ON/OFF power switch several times to completely discharge the device, then reconnect power to restart.
Technical Support
If you encounter usage issues, please get help through the following methods:
- Official website: www.elekscava.com
- Firmware updates: Visit official website regularly for latest firmware
- Technical support email: [email protected]